CMS Help
Advanced Content Management System
Image Galleries
- Tables of Contents
- Prepare a page
- Edit a page
- Calendar
- Image Galleries
- Rotating Images
- Create Isolated/Hidden Sections
- Create Restricted Categories
- Different Content for Authorized Visitor
- Interacting with an external program
- Extending the CMS
- Alias Names for pages
- Quick introduction to the language of the web HTML
Image Galleries
This background is for the site administrator and all page editors.
Topics:
- A gallery is a media folder which has been setup to support various gallery functions. This includes the generation of thumbnail copies of the images, setting the order of display and adding titles.
- All images being sent up to the server should be cleaned up and re-sized before being sent up via the Manage Media function. This is even more critical for Gallery images so that the thumbnails which are generated are of a similar size.
- Three tags are used in conjunction with the galleries.
- |.gallery:GalleryName:col:row.| will be replaced on the page by a table of thumbnail images from the specified gallery (here GalleryName) col wide and row tall. Clicking on a thumbnail will result the the original, full size image being displayed in a new browser window.
- |.galpages.| is replaced by a series of page numbers with left and right double arrows if there are more images than can fit in the specified gallery. (e.g., « 1 • 2 • 3 »)
- |.rotator:direction:GalleryName:time.| will be replaced by a each of the images in the gallery, Gallery Name the specified amount of time later. Want to use the thumbnails add ':T' before the final '.|' .
- In all cases other text and images can be put on the same page. There is a limitation of one gallery per page if galpages are used. Multiple rotators can; however, be used on the same page, but that may not be good design.
- Images which will be used in rotation need to be re-sized so be exactly the same height and width (if you use the thumbnails then the ratio width vs height must be the same so that the thumbnails are the same size).
- Decide on the ratio of width the height (e.g., square [4x4], wide [6x4] or tall [4x6], or other number pairs). and the size of the full size image e.g. 800 wide.
- Decide how many image you want to appear across the gallery page. The site administrator should have already assigned a gallery for your use. If not contact them. They may ask you how many images you want to fit across the page. That will control the size of the thumbnails that will be generated. The site designer will determine the width of the canvas. If the available width is 600 and you want to put three across the thumbnails need to be less than 200, if two then 300 and if 4 then 150. The actual width will be slightly less so that there is space between each. The site designer will provide this information.
- In an image editor (e.g, PhotoShop Element, the Gimp) load the image.
- Select the crop tool and set the ratio you have chosen.
- Drag through the image and move the highlighted area until you have the best fit you can get.
- Confirm the crop.
- Select Image Resize an specify the selected width.
- Save the image with a new name which explains what its about, remembering to use only letter, numbers and the underscore '_' character.
- Repeat for each image. Note: some programs have a special option "Save for the Web" if its available use this since it will better optimize the image for web display.
- Warning: Internet Explorer will not correctly display 32 bit images (CYMK) so the system will silently convert them to 24 bit images (RGB).
- Images which will not be used in a rotator just need to be re-sized to fit the final screen.
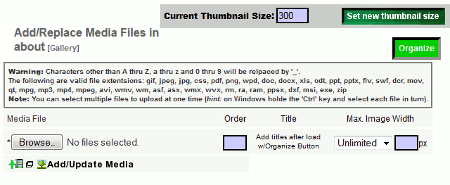
 Sign in and go to Mange Media and select the designated folder. You will see the word Gallery next to it.
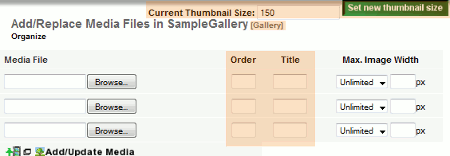
- Use the browse button to pick up each image (you can select multiple images by holding the 'Ctrl" key down and clicking on each image in turn). When you are done the number of images slected will appear next to the browse button.
- If you upload a single image you can put the display order (default is 500) in the order box. If you upload multiple images they all will be assigned the same display order. You can change the order later.
- Titles are assigned later.
- You can use the Max Image width to re-size the images after they reach the server, but you already did this didn't you, so you can ignore these. Note: if you send a full size image right out of the camera only send up one or two at a time (we protect the system from attack by limiting the total size of any uploads).
- Click on the "Add/Update Media button" button. Since your connection is probably slower sending information to the server, this may take some time. Typically the server can send an image to you ten times faster than you can send the image to the server.
- Repeat as needed.
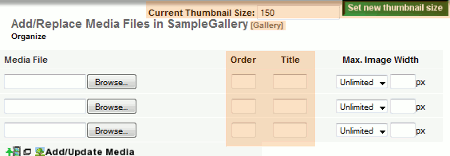
- Once you have uploaded the images click on the "Organize" button to open a popup window which will allow you to change the order and add titles to all of the images. When you set the order remember, just like pages, to leave gaps. The order is a 4 digit number (e.g., 0425) . Images will be displayed in the order you specify from smallest to largest. The title must not contain quotes.
- You've done the hard work. This part is easy.
- Select manage pages and either create a new page or select an existing page where the gallery thumbnails will be displayed.
- Determine how many rows will fit (you already determined the number of columns. Will all the image fit on the page? If yes, then you can skip the next item.
- Determine where you want to put the links to the other pages in the gallery. Place the tag |.galpages.| there.
- Place the gallery tag where you want the gallery to appear. The tag will look like |.gallery:SampleGallery:2:1.| (if you want to use HTML tables) or |.galleryDiv:SampleGallery:2:1.| (if you want to use DIV tags).
- Our sample gallery has three images so here is the result.
- Each thumbnail will contain a pop-up link to a larger image.
- If the site was set up with a special template (gal.tp1) then clicking on the image will open a popup using this template which will allow the visitor to move forward or backward through the images in the gallery. If the images are larger than the template allows the image will be shrunk by the browser to fit and a link to the full size image will be provided.
- If there is not gal.tp1 template, then the pop-up will open a link sized for the full size image. Note: for visitors on mobile devices this will may make closing the image more difficult.
Setting up a set of Rotating Images 
- An image rotator simply displays each of the images in a gallery (or each of the thumbnails) one after another. Like all images you have to specify if you want the image (or in this case images) to appear to the left or the right of each of the surrounding material. You also have to tell it how long each image will be displayed in thousands of a second (that's the time interval browsers think in so 2.5 seconds is 2500).
- The tag for rotating thumbnails is |rotator:direction:GalleryName:Time:T.| Direction is usually Left or Right, GalleryName is where the images are to be found, time is the time in milliseconds and T is just a character that tells the system you are going to be using thumbnails.
- The tage for rotating the fullsize images is the same except without the ':T' e.g., |rotator:direction:GalleryName:Time.|

here the rotator changes every five seconds and it to the right of the text.

